Quickly printing to reMarkable
20 Mar 2021(Assumed audience: folks with a working knowledge of the command line and macOS.)
The tl;dr steps
You can map ⌘ + P + P — i.e. holding command and hitting P twice — to “print” PDFs directly to your reMarkable with the following steps:
- Open terminal and
cd ~(or wherever you prefer to house thermapibinary). - Run
curl -L https://github.com/juruen/rmapi/releases/download/v0.0.13/rmapi-macosx.zip -o rmapi.zipin that directory. unzip rmapi.zip && rm rmapi.zip && ./rmapi-
You’ll hit the following prompt:
Enter one-time code (go to …):Head over to my.remarkable.com ⇒ “Manage Device” ⇒ “Reconnect your reMarkable” ⇒ copy the provided one-time code and paste it back into Terminal.
- If everything goes smoothly, you’ll see an empty shell, after which you can type
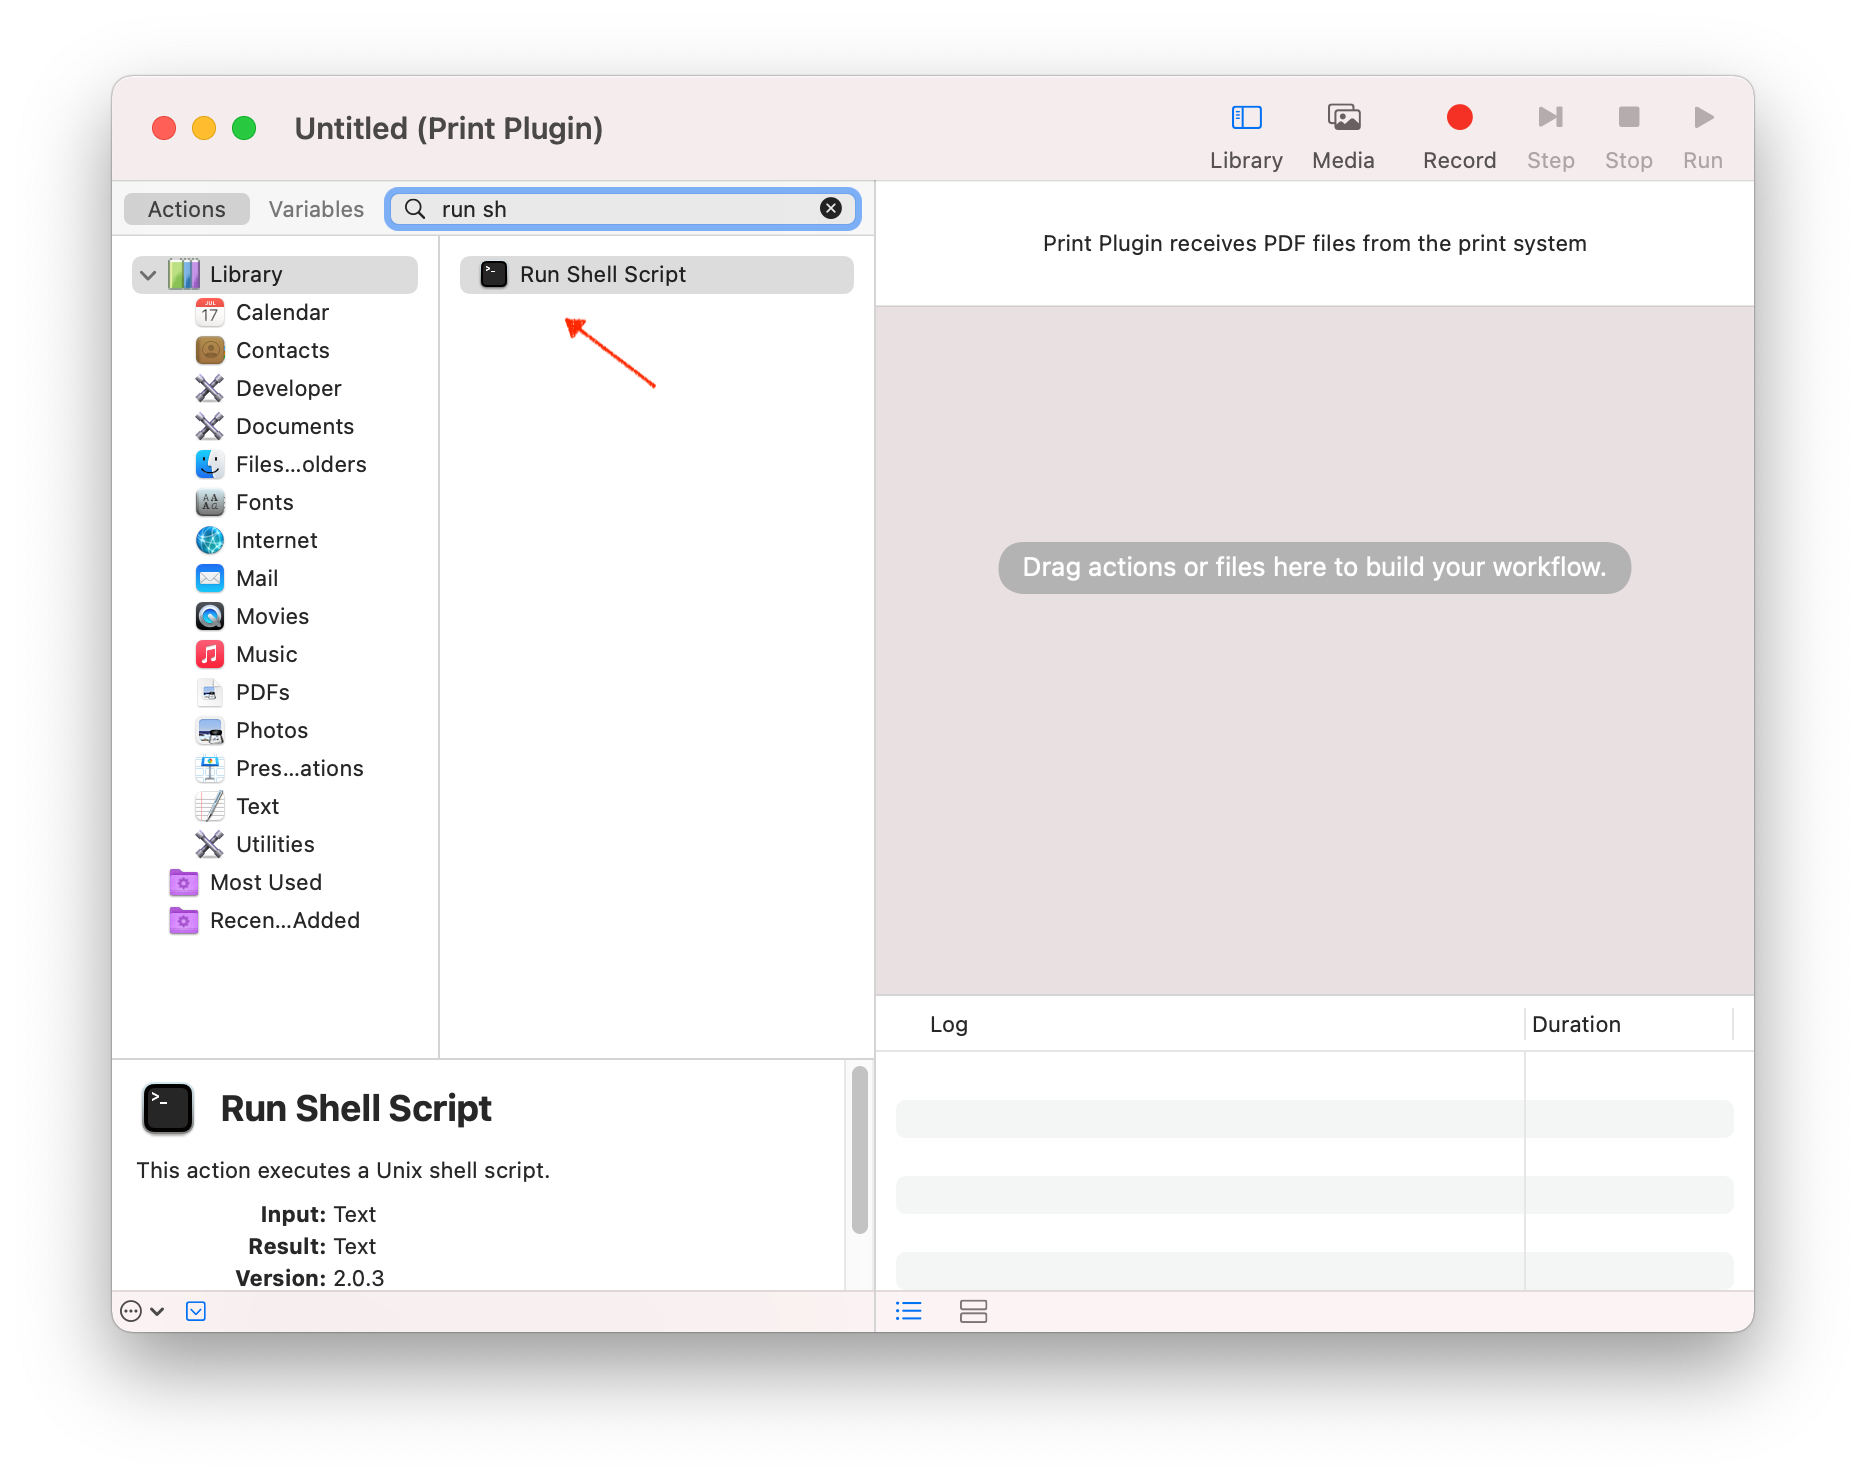
exitto quit. - Open Automator (pre-installed on macOS).
- ⌘ + N, select “Print Plugin.”
-
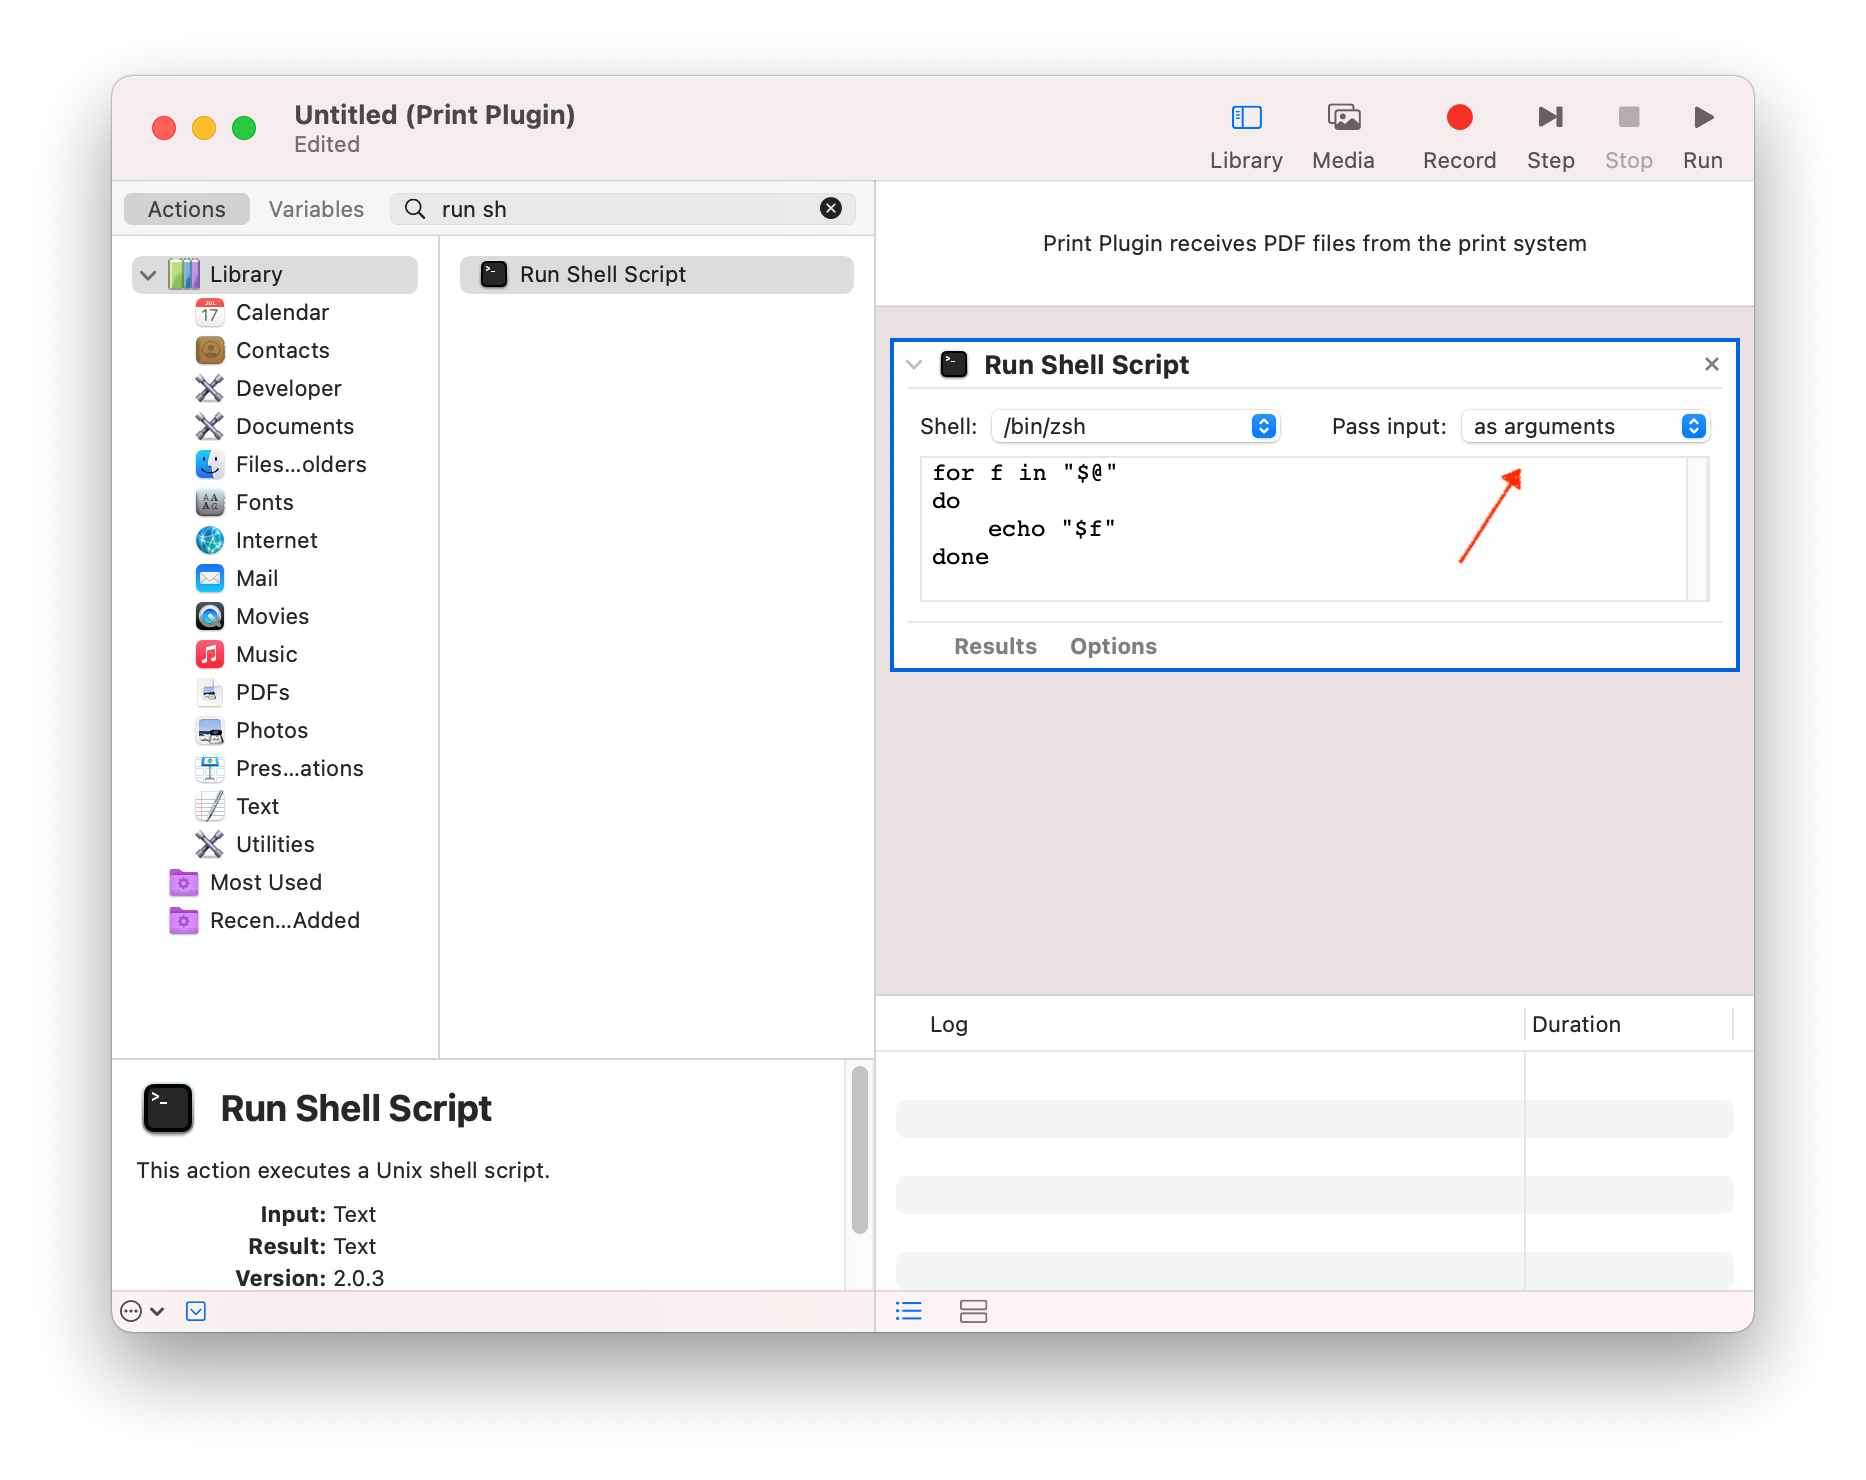
Search for the “Run Shell Script” action and drag it into the workflow.
-
Flip “Pass input:” from to “stdin” to “as arguments.”
-
Replace the action body with the following (and subbing out
~with another directory if you didn’t downloadrmapithere).for f in "$@" do ~/rmapi put "$f" done(Note, you can specify an existing folder on your reMarkable for printed PDFs to land by appending a directory after the
putcommand — e.g.~/rmapi put "$f" /Inboxor if it has a space in the name, something like~/rmapi put "$f" /Blog\ Posts.) - ⌘ + S and save the plugin as “Print to reMarkable”.
-
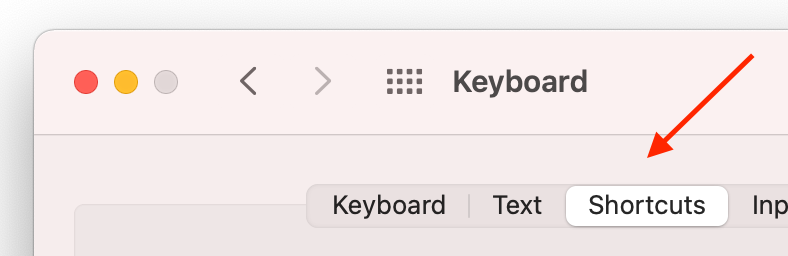
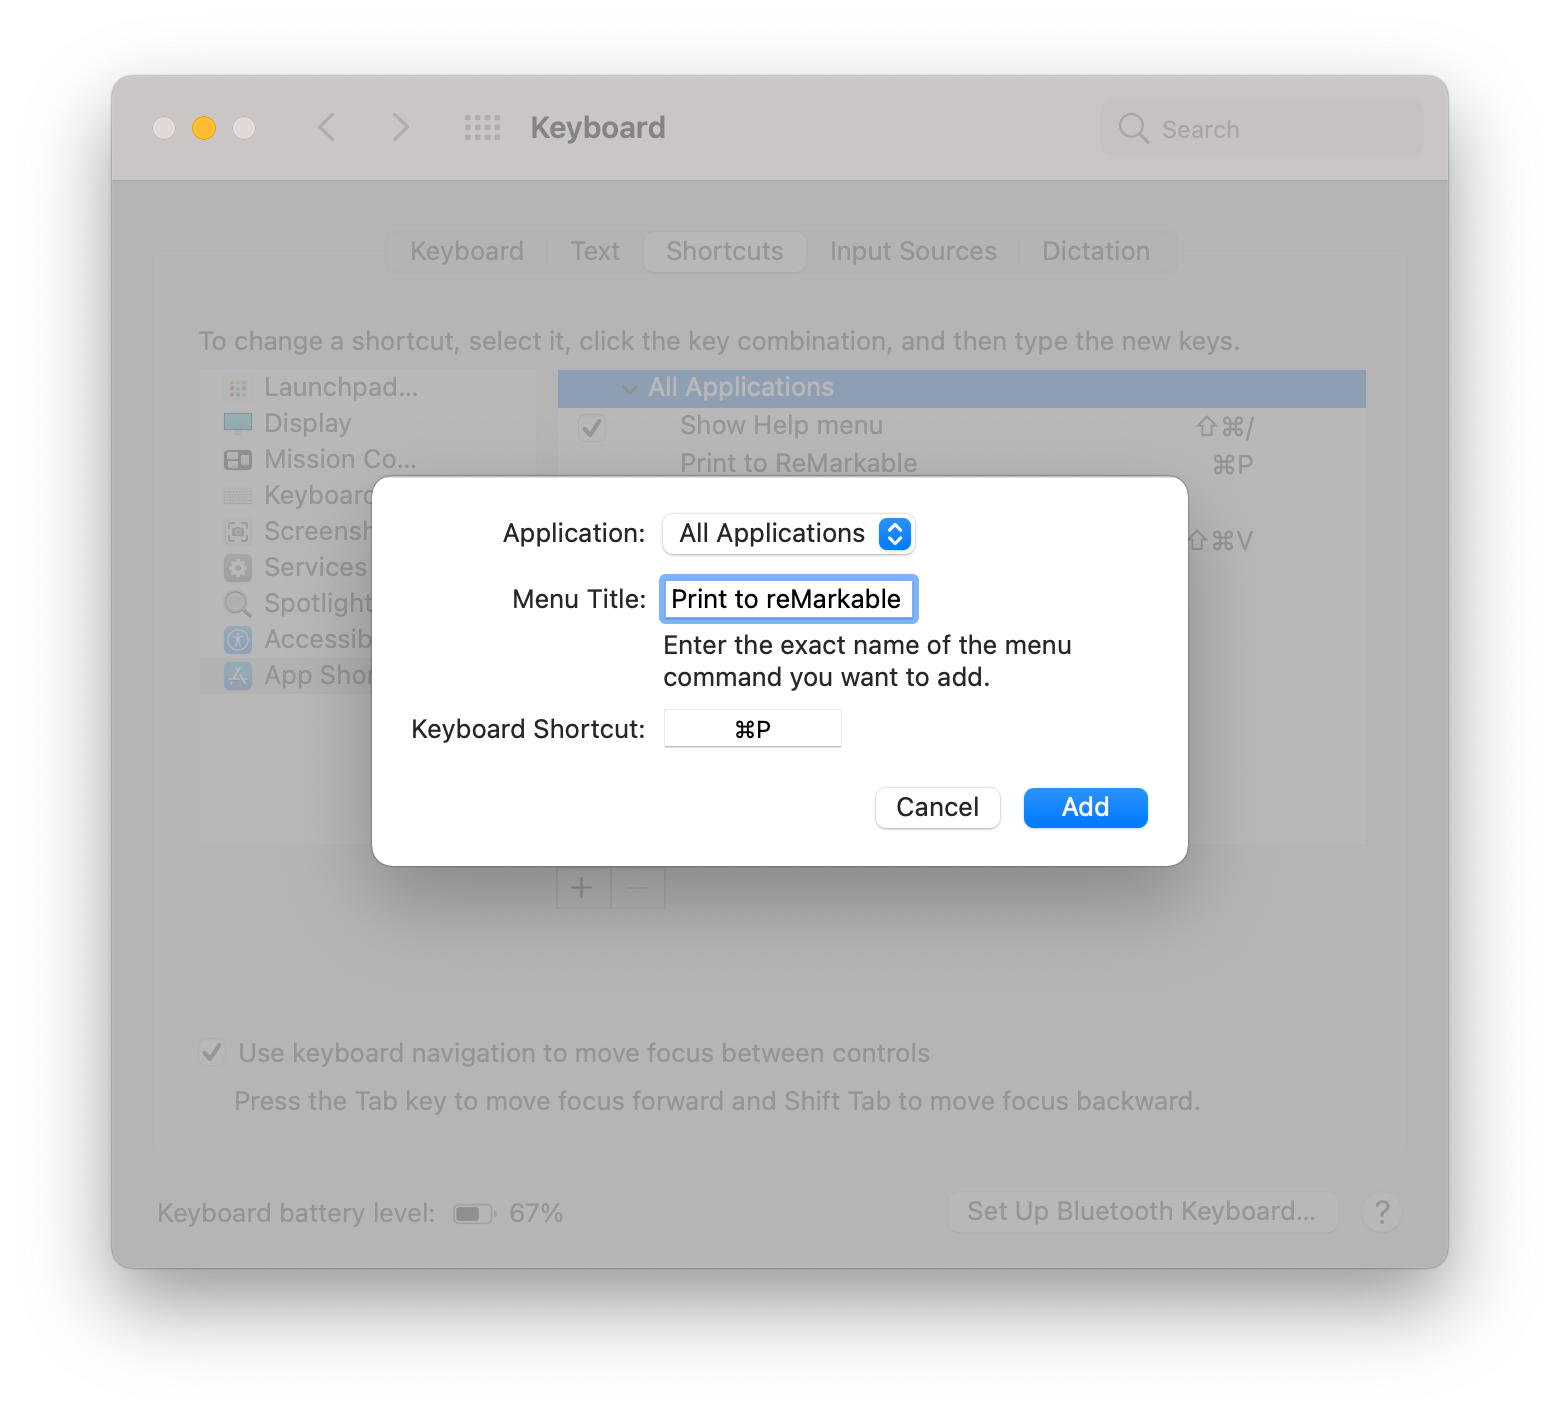
Open the Shortcuts tab in the Keyboard system preference pane.
-
Add a new “App Shortcut” tucked under “All Applications” pointing to the menu title “Print to reMarkable” from above. Use ⌘ + P as the shortcut (binding it to the second P in the overall command).
- Click “Add” and you should be off to the races! I’ll often toggle Reader Mode in Safari before sending articles, blog posts, or the like to the device.
…and some context.
My reMarkable usage has spanned both ends of the spectrum — there will be weeks where I read from it daily and dry spells from a weekend trip or heavier workload that shifts me out of the routine. Still, a constant has been queueing PDFs with the above shortcut. I’ve always fumbled this setup on new Macs, so this post doubles as finally writing down the steps for a future Jasdev.
reMarkable also offers a Chrome extension for a similar workflow, but it’s of course restricted to Chrome whereas this approach works in any application that supports printing.
This entry is an adaption (and combination) of rmapi’s tutorial on printing directly to your reMarkable and David Sparks’ post on setting a shortcut for “Save as PDF.”
■